Social media and phone cameras have made capturing and sharing our favorite drinks easier than ever. But to really make your image stand out in the infinite scroll, you’ll want to step up the production value of your photos. We talked with two food photography pros — New Orleans photographer Matthew Noel and New York food stylist Sasha Gitin — for their tips on taking a great picture of your cocktail. Yes, even when you’re stuck using a cell phone in a dark bar.
1. Don’t mix artificial and natural light
When shooting indoors, try to avoid a shot where artificial light and natural light overlap in the frame. Matthew Noel, who shoots for Edible New Orleans, explains that natural light can be very cool while incandescent lights tend to be very warm. Mixing the two can make for some odd overlap. “If you can, turn off the interior lights or find a window that doesn’t really have much of that light falling on it,” he suggests.
2. In a dark bar, look for the light
If you’re shooting in a dark bar, pick a table with good lighting—not the romantic corner in the dark. “You want something that’s going to be bright, but also kind of side-lit or back-lit, because you’ll get a little bit of light going through the drink,” says Noel. “A lot of times at the bar itself there’s overhead lighting—you can utilize that.”
New York food photographer and stylist Sasha Gitin says you can also use decorative votives to help light the cocktail. “Grab a few to illuminate surfaces around your drink,” says Gitin. “Cocktails look best when lit from the back or top.” But beware of the flash on the front—it can create unwanted reflections and glare on the glass.
3. When using a smartphone, focus on a darker part of the image
Where you tell your phone to focus is where it’s going to take the exposure reading, says Noel. So, telling your camera to focus on a darker part of the image can brighten things up, while the opposite is true if you focus on a brighter spot. (For most smartphone users, this is as simple as tapping and holding on the part of your screen where you want the camera to focus.)
4. Enlist a friend
If the lighting is really drab, Gitin says you can get help from a friend—and their phone. “The easiest thing is to utilize a second, borrowed phone as a light,” he explains. “Turn off the flash on your phone, turn on flashlight on second (borrowed) phone to backlight the drink, and shoot.”
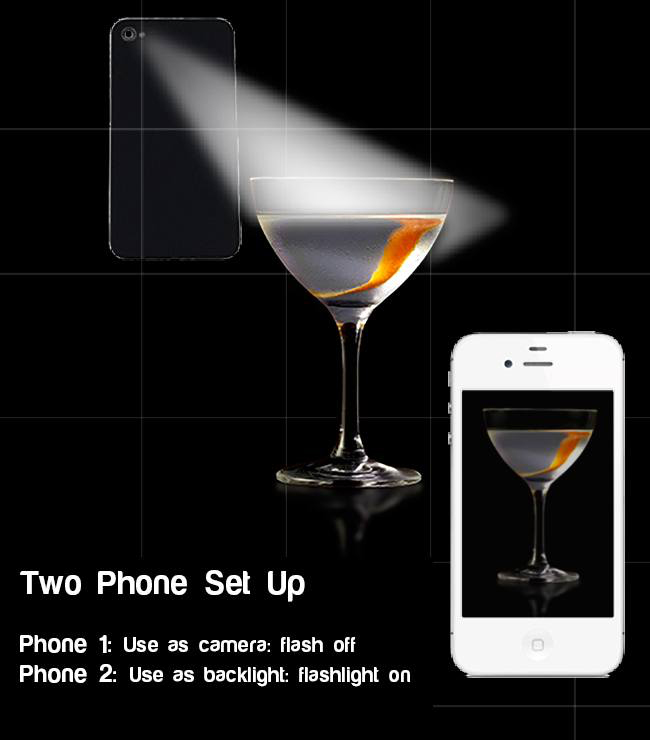 If you’re photographing in low-light conditions, Sasha Gitin recommends using a second camera as a light source.
5. Set up your shot with a stand-in
Drinks can change pretty quickly: foam can fall, ice can melt, fizz can go flat. If the shot you want has a more complex setup, Noel recommends crumpling up a napkin and putting it in a glass to use as a stand-in so you can prep your shot before your drink is ready. A glass of icewater will also work for this.
6. Don’t get too close
Unless you have a good macro lens, you’ll be better off putting some space between your camera and your drink. This is especially true if you’re using a cell phone, since you’ll have a better chance of getting an in-focus image by backing up a bit—some pros recommend a sweet spot of two to four feet away from your subject.
7. Try different angles—all of them
All of our experts suggest trying out lots of different angles. By moving 90 or 180 degrees around the drink you want to photograph, you can find the best light. That way, your drink will look as inviting and delicious as possible.
8. Ask what story you want the photo to tell
Before you even pick up your camera, Noel says to first figure out what you want the photo to say. Is your picture about a special recipe or ingredient? Is it about the connection to the location? Are you celebrating a special moment with a toast? “Those are much more important questions to ask before you even start photographing something,” said Noel. That can help you decide what elements you want in the frame.
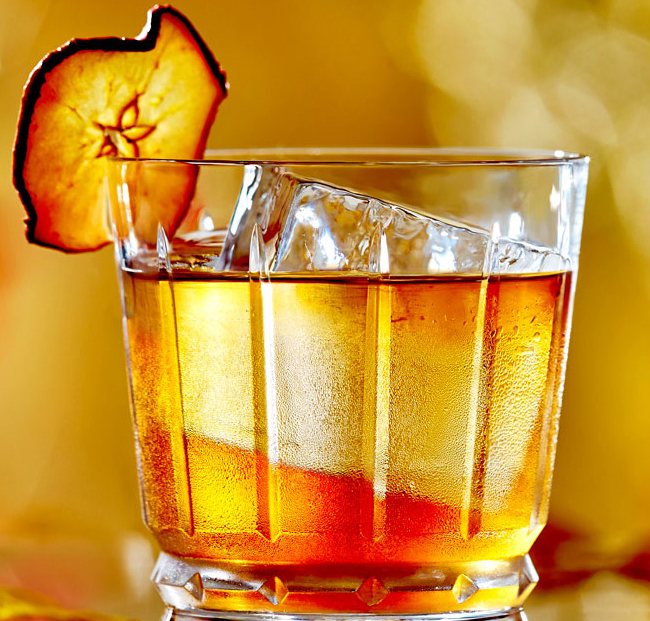 Photographer Matthew Noel recommends prepping your shot with a stand-in so you aren’t stuck with a diluted drink or sweaty glass.rn


